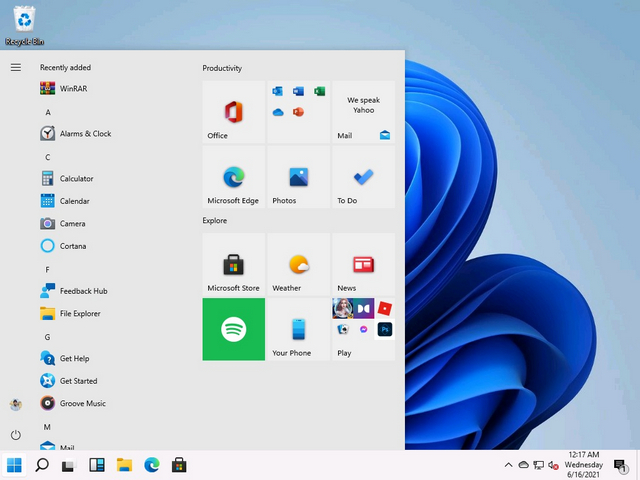
Customize the Windows 11 Start Menu (2021)
Here, we have detailed everything you need to know about the new Windows 11 Start Menu and how to personalize it as per your needs. As the new Start menu is different, you might have to give it some time to grow on you. Nevertheless, we have provided some important tips to better your Start Menu experience on Windows 11.
Rearrange Icons and Pin Apps to Windows 11 Start Menu
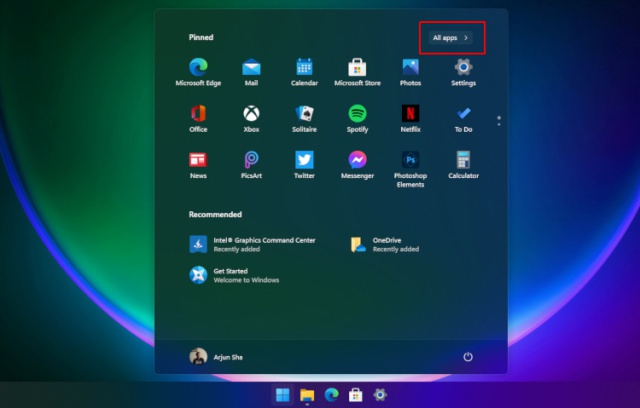
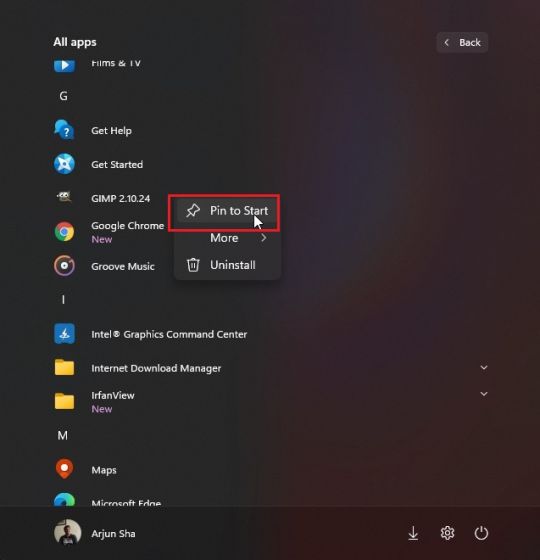
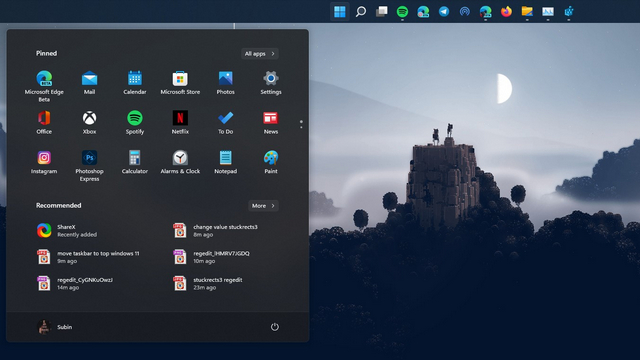
The best way to find your favorite apps on any Windows version is by pinning them to the Start Menu. And well, you can do the same in Windows 11 as well. Simply click on “All Apps” at the top right, scroll down and go to the app you want to pin to the Start Menu.
Then, right-click on it and select the “Pin to Start” option. You can also do it from the desktop or any other location. And as we have explained below, you can also pin folders to the Start Menu.
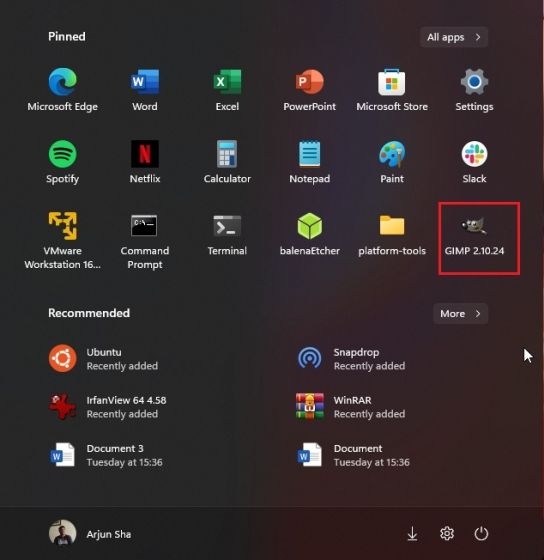
And voila! The app will appear in the “Pinned” section front and center.
Manage Pinned Apps in Windows 11 Start Menu
You can also drag the app and move it to any position in the “Pinned” apps list of your liking
Moreover, if you pin more than 18 apps to the Start Menu, then Windows 11 adds a second page. You can scroll to move between different pages of pinned apps.
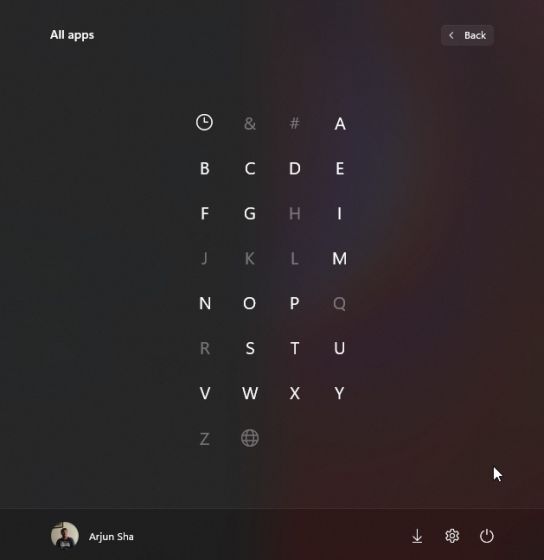
By the way, you can still search for apps on Windows 11 in alphabetical order. Just open “All apps” and click on any alphabet.
Tune Recommendations in Windows 11 Start Menu
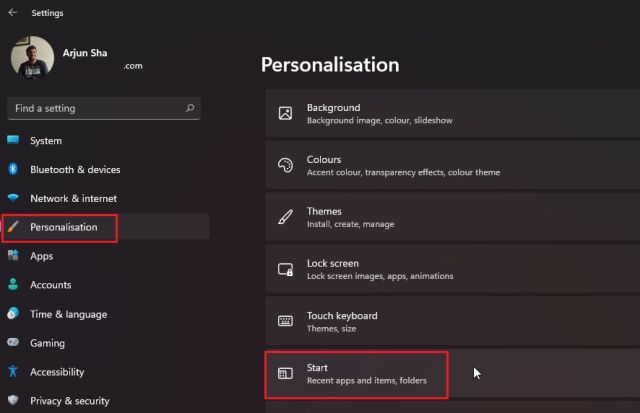
First off, open Settings and navigate to “Personalization” from the left pane. Here, scroll down and go to “Start” settings.
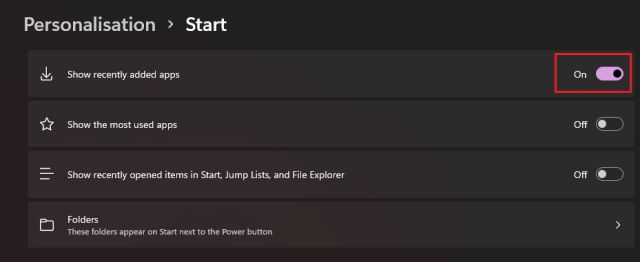
Now, I would suggest enabling “Show recently added apps” to find the new app or program in the Start Menu immediately after installing it. You save time by not scrolling through the entire app list to find a newly installed app.
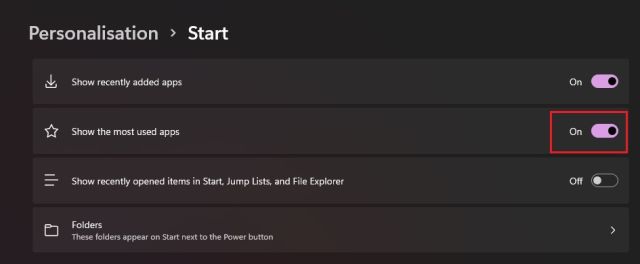
Next, enable “Show the most used apps” to get recommendations of frequently used apps front and center in the Start Menu.
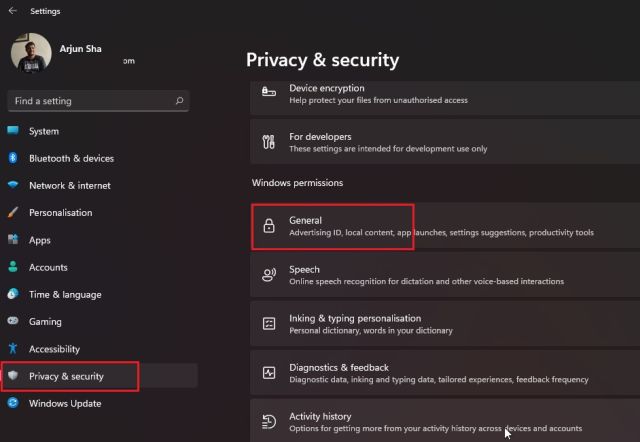
Next, if the “Show the most used apps” toggle is greyed out, you need to enable a privacy setting to make it work. Open Settings and jump to “Privacy & Security” from the left pane. Here, click on “General”.
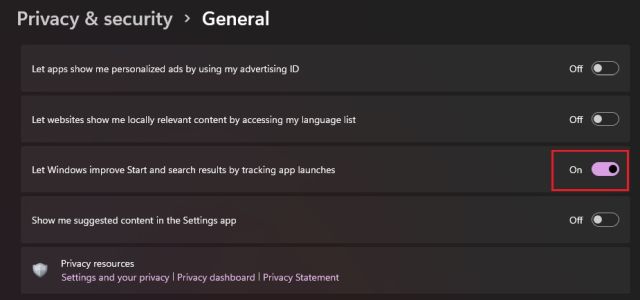
After that, enable “Let Windows improve Start and search results by tracking app launches”. Now, go ahead and open the Personalization page once again. You will now be able to turn on the “Show the most used apps” option.
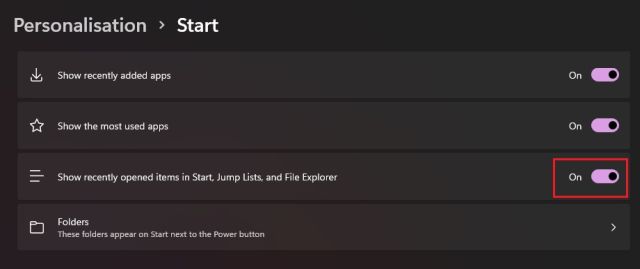
Besides that, enable the “Show recently opened items in Start, Jump Lists and File Explorer” option. It will offer you quick access to files and programs you access across your Windows 11 PC in the Start Menu.
Add Folders to Windows 11 Start Menu
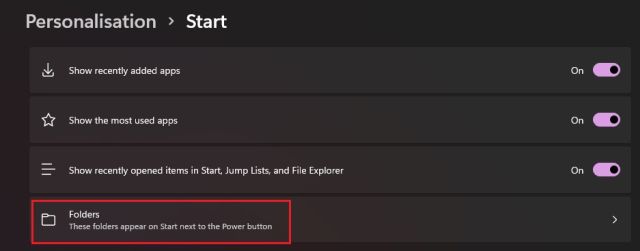
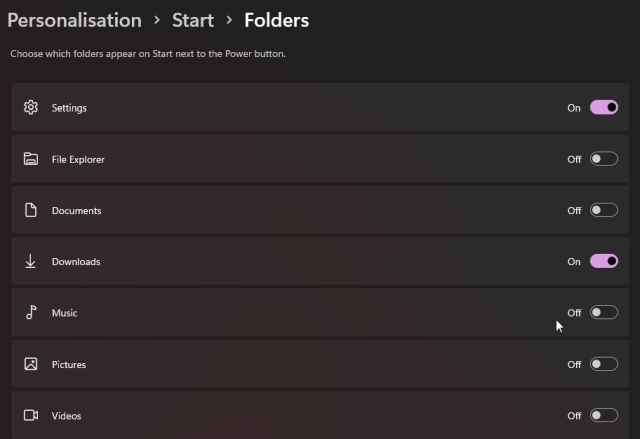
Similar to Windows 10, Windows 11 also lets you add folders to the Start Menu. Go to the Settings -> Personalization -> Start page and click on “Folders“.
Here, you can add folders such as Downloads, Documents, Pictures, and more to the Start Menu.
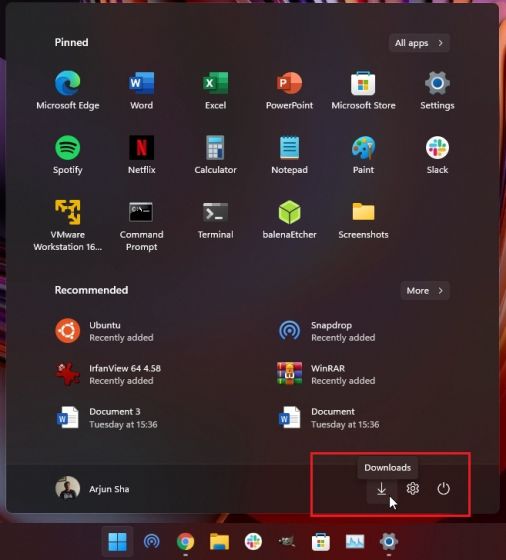
The folders will appear to the left of the power menu in the Start Menu. This way, you can quickly access important folders from the Windows 11 Start menu without ever needing to scroll through pinned apps or anything.
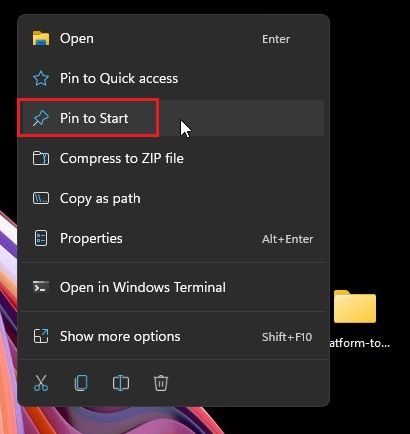
In case you want to add a custom folder to the Start menu, that’s also possible in Windows 11. To do this, right-click on that folder and click on the “Pin to Start” option. The new OS natively supports pinning folders to the Start Menu, so you don’t need to use any third-party apps or tweak the AppData folder.
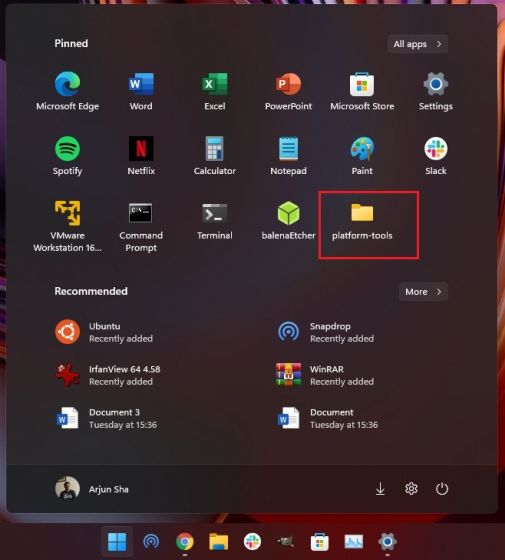
Now, the custom folder will appear in the “Pinned” apps section in the Start Menu. You can use this feature to keep your desktop clean and clutter-free.
Bring Back the Classic Start Menu in Windows 11
In case you don’t like the Windows 10X-style Start Menu on Windows 11 and want the classic Start menu with Live Tiles support back on Windows 11, you can do that as well. Simply follow our linked article for detailed steps on how to edit the registry files to get access to the old Windows 10-style Start Menu. Microsoft has also added an option to move to the Start Menu and other taskbar icons back to the left edge. Navigate to Settings -> Personalization -> Taskbar and select “Left” from the new “Taskbar alignment” option.
Move Windows 11 Taskbar, Start Menu to the Top or Side
That was all about the Start menu, but if you want to move the taskbar on Windows 11 to different sides, say the top or right side, well, you can do that with some Registry tweaks. Just follow our detailed guide on how to move the Windows 11 Taskbar to the top, left, or right side of the screen, and you will be all set.
Personalize the Start Menu on Windows 11 to Get the Most Out of It